Obirum ICO: How to create an Ether wallet supports ERC20 and get ETH
Prior
to starting with the exact steps we would like to highlight that
payments without data or gas limit fields are rejected. Also, do NOT
send Ether from an exchange. Use MyEtherWallet, MetaMask, Mist wallets,
or other ERC20 compatible ones.
Join Obirum ICO at : ico-obirum
- How to create an ether wallet supports ERC20
First
of all you need to have an Ether wallet. Creating an ether wallet is a
must in order to participate in the crowdsale and receive your tokens.
- Option 1: MyEtherWallet
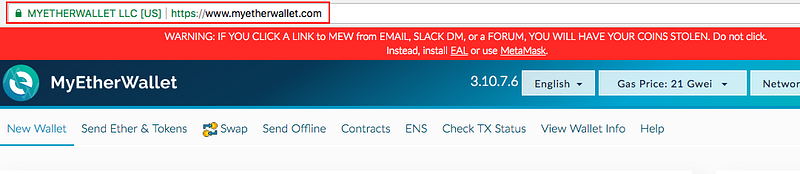
STEP 1: Go to https://www.myetherwallet.com/ and make sure the URL is correct and MYETHERWALLET LLC [US] certificate is there.
STEP 2: Go to the “New Wallet” Tab
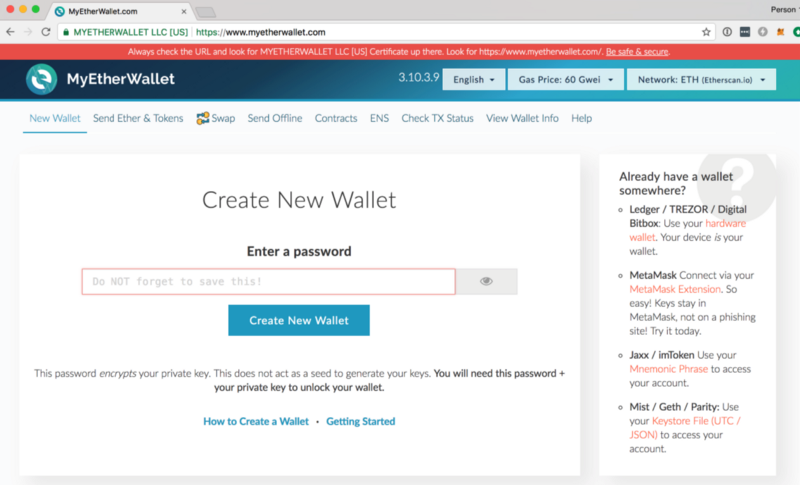
STEP 3: Enter a Strong Password
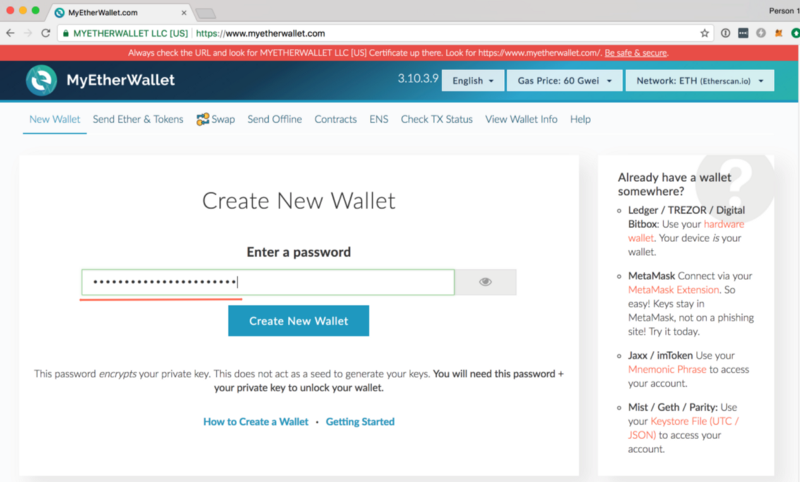
Enter a password that will be used to access your wallet:
1. Create a strong password, using upper and lower-case letters, and also numbers and symbols (e.g., “#”, “@”, etc.).
2. Do not lose this password. Losing this password is equivalent to losing all ETH and OBR stored in your account. Click on the Create New Wallet button.
STEP 4: Save Your Keystore File
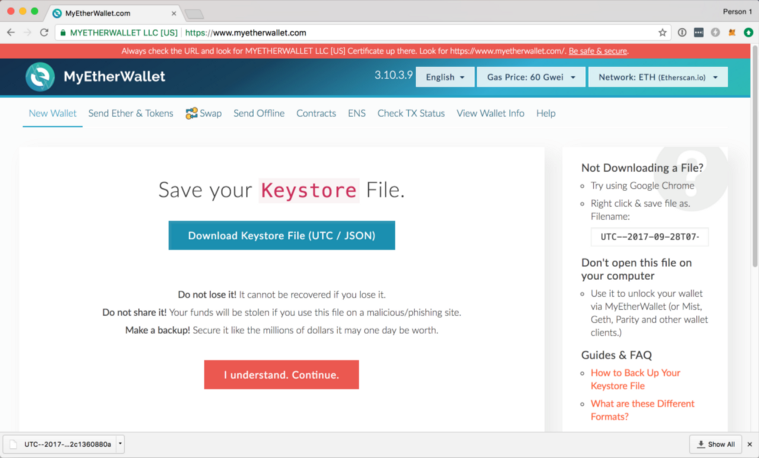
This file contains your private and public keys and is required every time you want to access your account.
NOTE:
you won’t be able to access your account without this file and the
password from the previous step. Losing either one of them is equivalent
to losing all ETH and OBR stored in your account.
STEP 5(optional): Backup Your Private Key

If you would like to make this account accessible by other Ethereum wallets, you can export and backup your private key.
You should never share your private keys with anyone else. If your wallet address is the equivalent of your bank account number, then your private wallet key is your PIN. If anyone obtains your private key, they will have access to all of your funds.
STEP 6: Unlock Your Wallet to View the Public Address
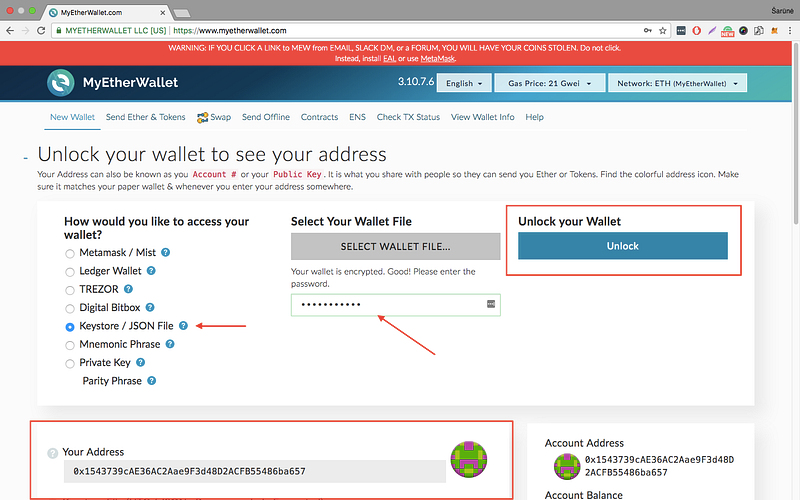
Follow the instructions to unlock your wallet and get your public address:
- Select the Keystore File (UTC / JSON) and select the keystore file you’ve downloaded in the previous step.
- Input the password you set on step 3 and click on the Unlock button to unlock it.
STEP 7: Save Your Public Address
Now that you have created the wallet you should now be able to see your Ethereum public address under the Your Address label or the Account Address section.
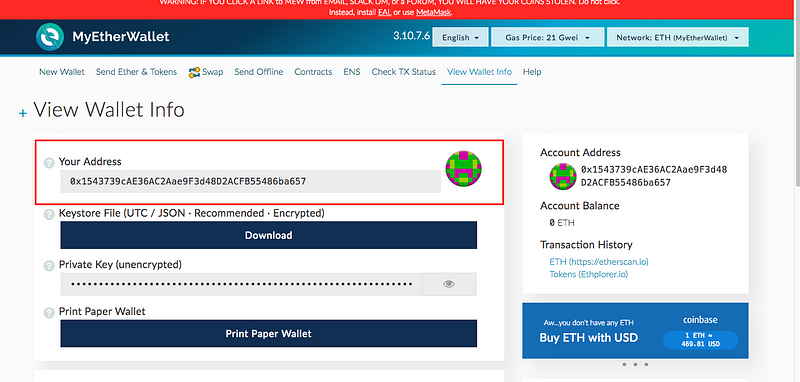
You will need to provide this public address during your registration for the Obirum token sale.
You will need to provide this public address to transfer ETH to your wallet.
Do not lose your password and the keystore file, as you will need to use them in the Obirum token sale.
- Option 2: MetaMask
(Note: if you already have MyEtherWallet, you may skip this alternative option and proceed with the Section 2.)
MetaMask is a plugin for Google Chrome browser. It can be downloaded and installed from metamask.io
STEP 1: Go to https://metamask.io and click on GET CHROME EXTENSION.

STEP 2: Chrome web store will open in a new tab. Click on Add Extension
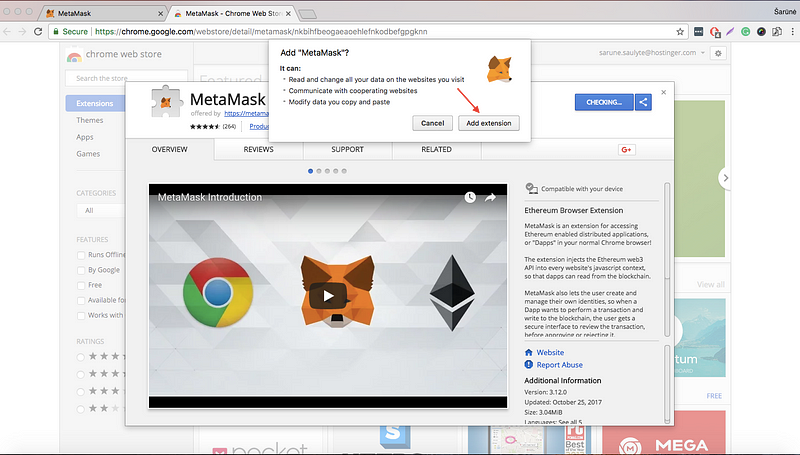
STEP 3: Click on +ADD TO CHROME

STEP 4: Read the Terms of Use and click on Accept.
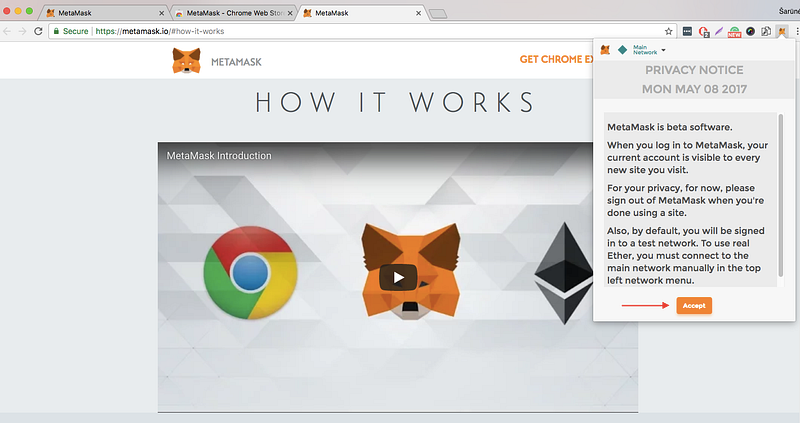
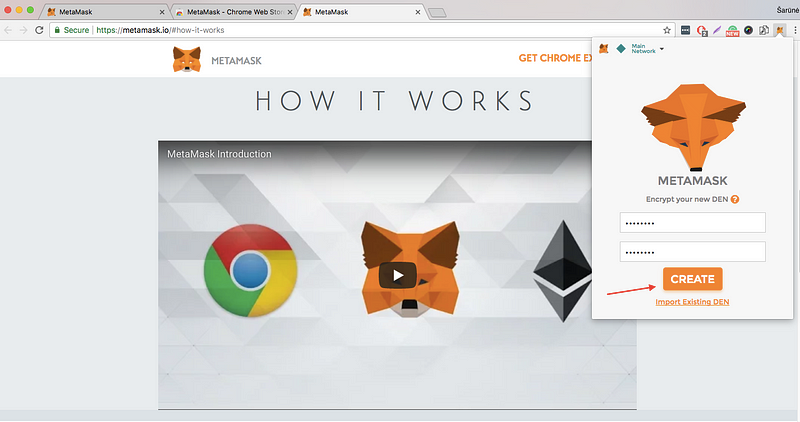
STEP 5: Enter a secure password twice and click on CREATE.
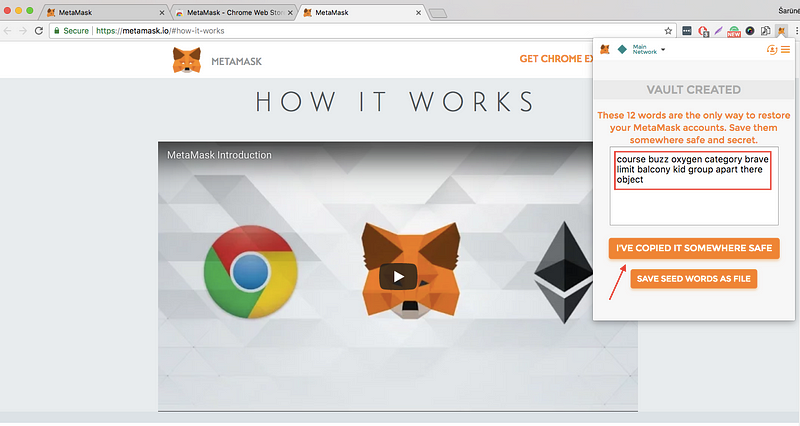
STEP 6: Copy the words that appeared on your screen and save them somewhere safe. Then click on I’ve copied it somewhere safe.
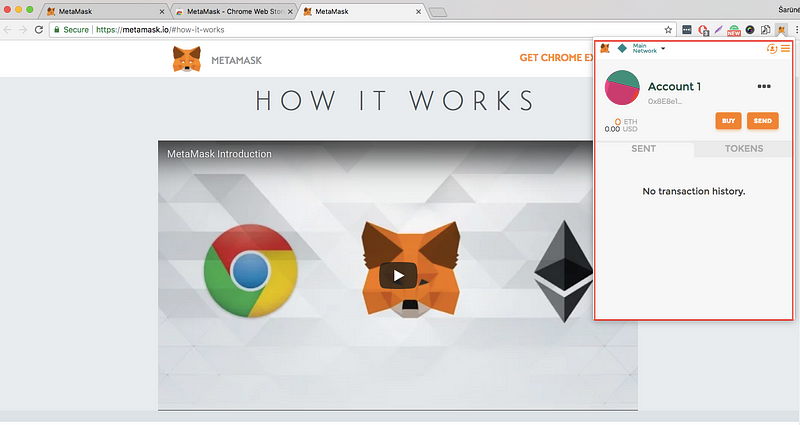
STEP 7: A wallet named Account 1 will be created for you by default.
- Option 3: MIST
(Note: if you already have MyEtherWallet, you may skip this alternative option and proceed with the Section 2.)
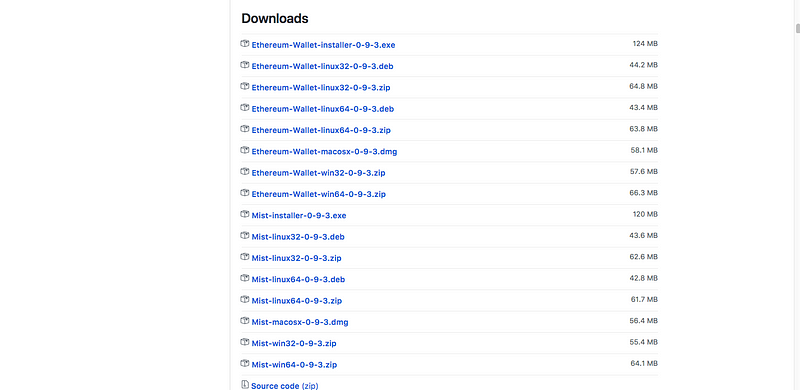
STEP 1: Download the latest Mist release here (https://github.com/ethereum/mist/releases). For this tutorial we are using Ethereum Mist for Mac OS.
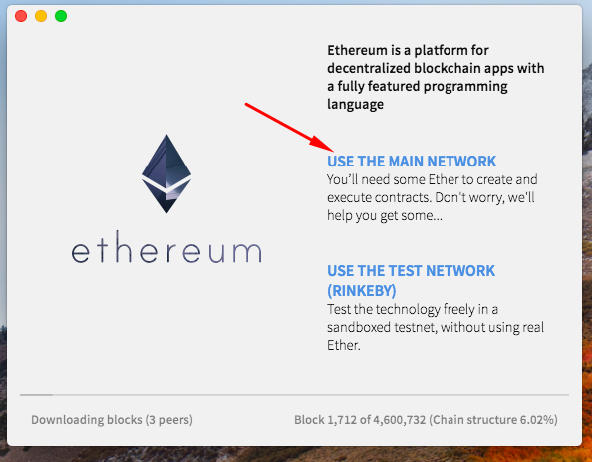
STEP 2: Click USE THE MAIN NETWORK
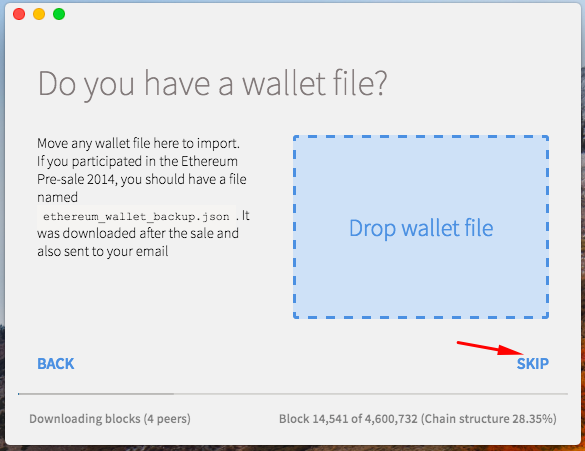
STEP 3: Click SKIP on “Do you have wallet file”
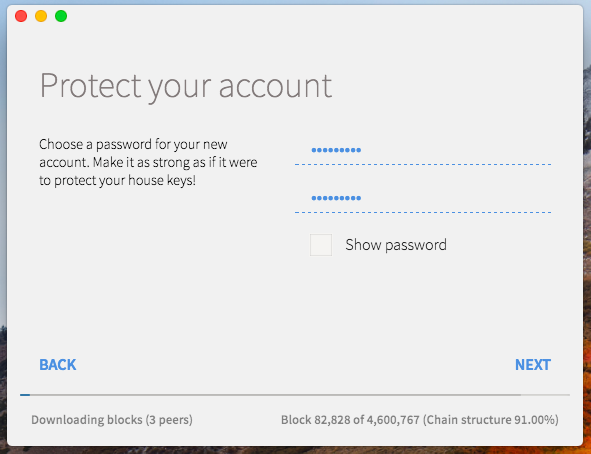
STEP 4: Pick a secure password and enter it twice
STEP 5: Your Main Account address is here. Be sure to write it down
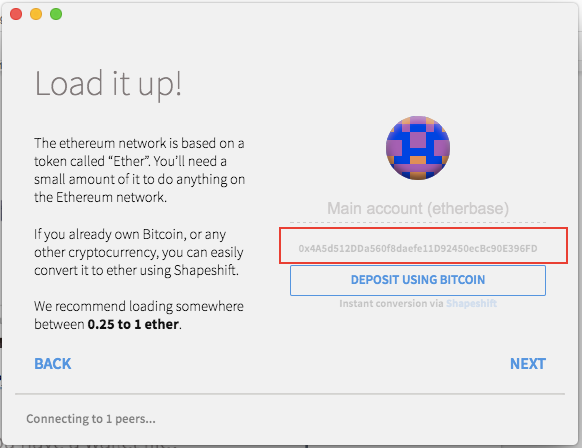
STEP 6: Click NEXT and wait for download.
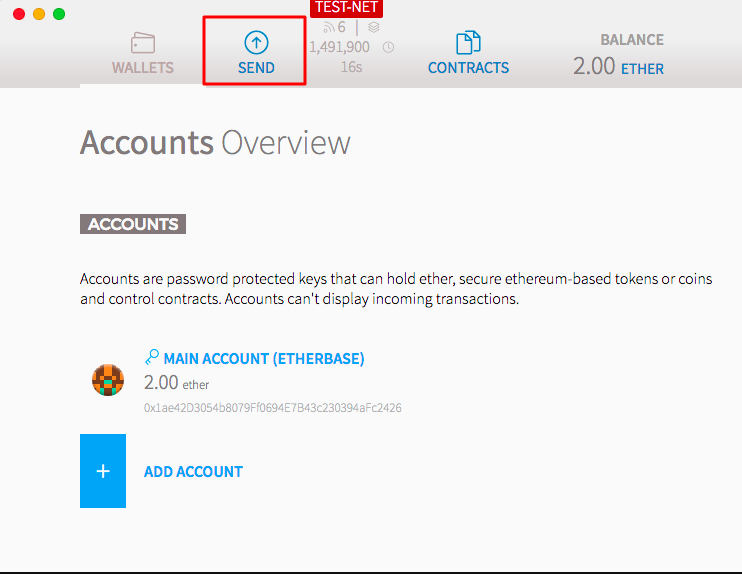
STEP 7: Here is the account overview screen you will see once the download is complete, you can use SEND to send Ether. To receive the ether from other party, simply share the address from Step 5.
You will need to provide this public address during your registration for the Obirum token sale.
You will need to provide this public address to transfer ETH to your wallet.
Do not lose your password and the keystore file, as you will need to use them in the Obirum token sale.
2. How to get Ethereum and transfer it to your wallet:
There are a few ways to get Ether. We suggest using one of the following:
- Purchasing by bank transfer,
- Purchasing by Credit Card,
- Exchanging Bitcoin or other cryptocurrency.
We suggest using Cex.io or Kraken.com as their interface is really easy-to-use.
NOTE: Kraken.com does not accept transfers from Credit Card.
- Purchasing by bank transfer,
- Purchasing by Credit Card,
- Exchanging Bitcoin or other cryptocurrency.
We suggest using Cex.io or Kraken.com as their interface is really easy-to-use.
NOTE: Kraken.com does not accept transfers from Credit Card.
- Option 1: (pay with crypto, bank transfer) — Kraken.com
PART 1 — Getting ETH
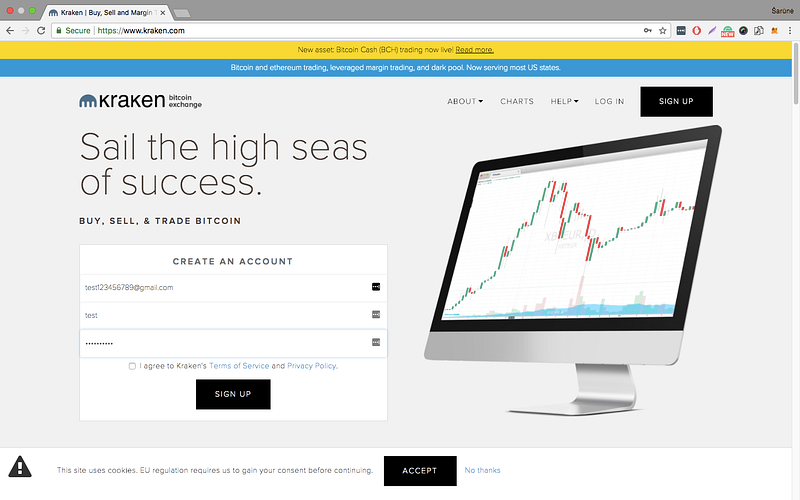
Step 1: Create
an account by entering your email, selecting a username and a secure
password. Click on the black sign up box in the right corner:
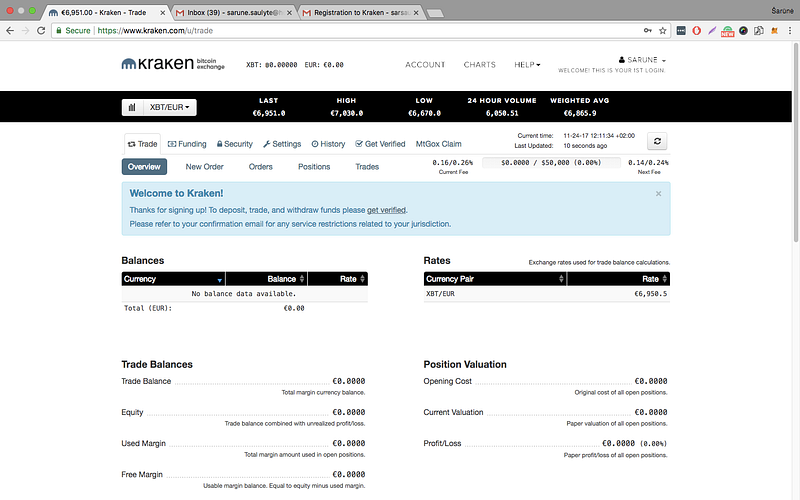
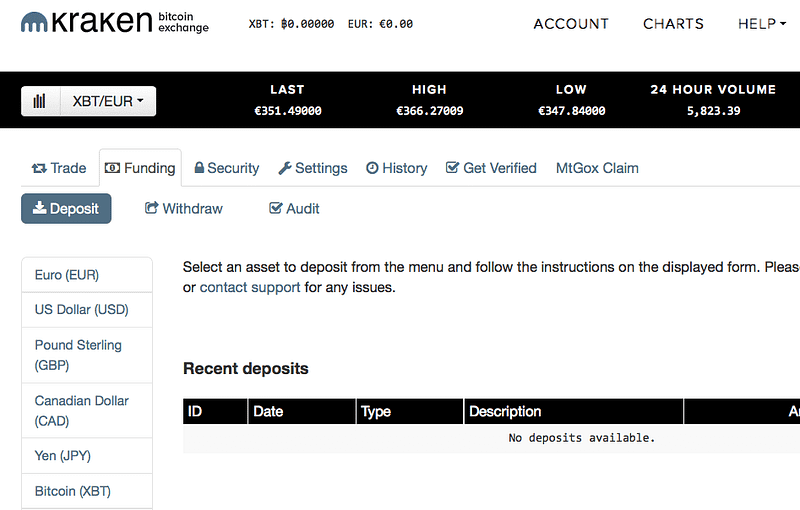
Step 2: You’ll receive an email confirmation letter. Once your account is confirmed log in. Your screen should look similar to this:
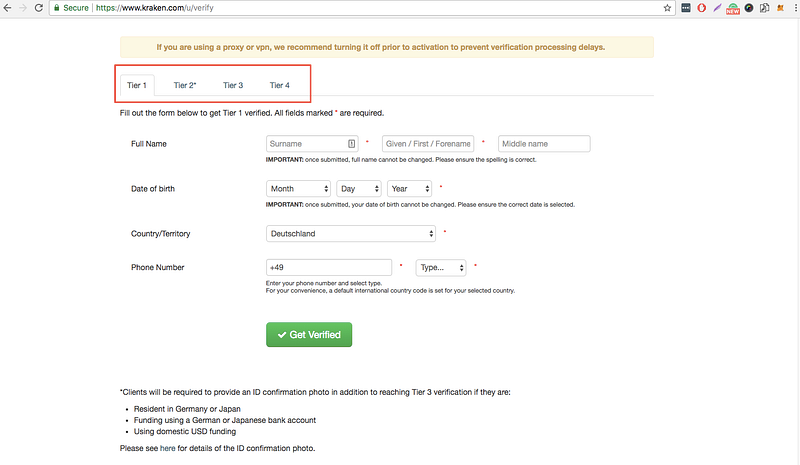
Step 3: Now you must verify your personal information. You can do that by clicking on Get verified.
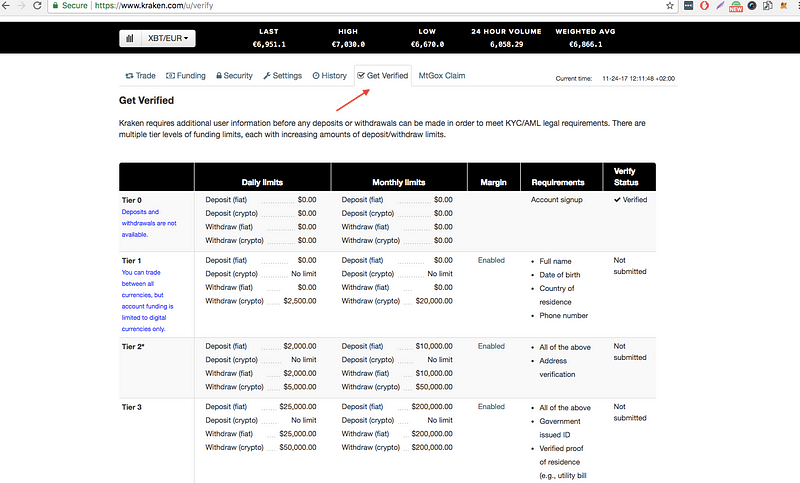
Step 4: Select the applicable Tier and verify your identity. It usually takes up to 2–3 days.
Step 5: Once your account is verified, go to the Funding tab. Select your funding method from the left side and deposit the desired amount of selected currency.
Step 6: Once your account is funded, select Trade and New Order to place orders. Note that the currency pair you select plays a role in determining what is bought. Select the BUY button and choose a currency pair x/y, then currency x will be bought and currency y sold.
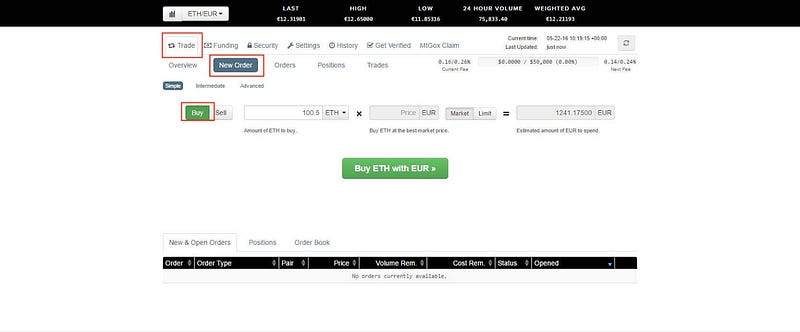
Step 7: Enter the desired amount and press Buy x with y.
PART 2. Transferring ETH to your wallet
Step 1: Login to your account and go to Funding tab. Select Withdraw. Press on Ether (ETH).
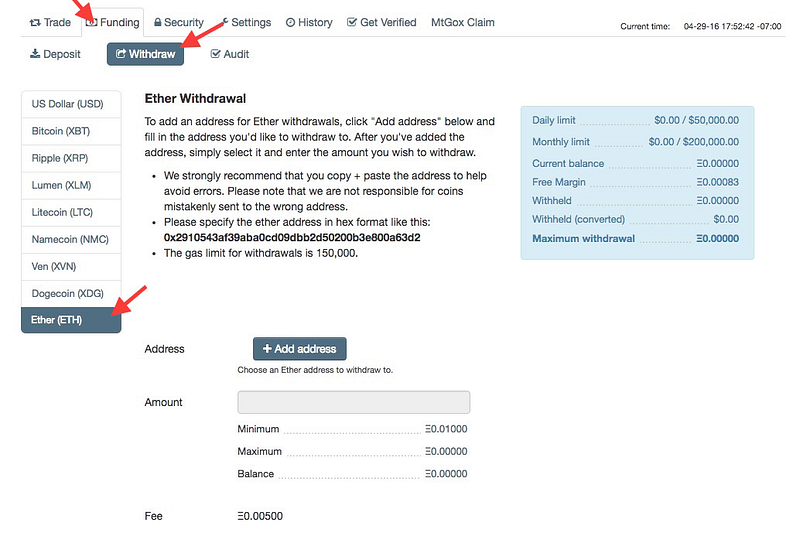
Step 2: Click on +Add address. Add a description and your Ether wallet address. Save it and click the Back button.
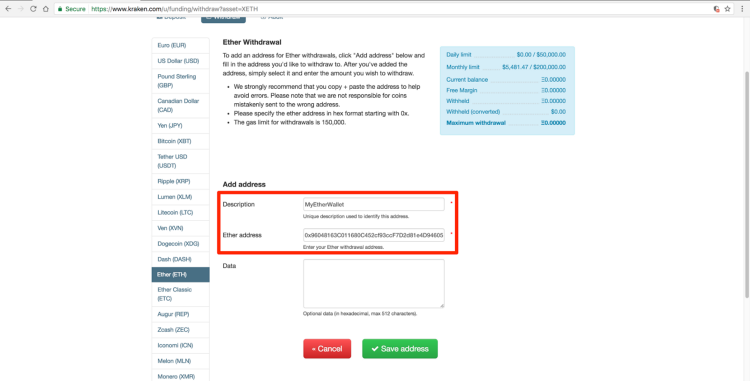
Step 3: Select the address you just created from the dropdown. Enter the amount. →Review Withdrawal → Confirm Withdrawal.
Once the Initiated status changes to Success you can access your Ether wallet and see the balance.
- Option 2: (pay with crypto, credit card, bank transfer) — Cex.io
In
this tutorial we will show how to exchange money from your credit/debit
card. Making a bank transfer or exchanging a cryptocurrency process is
similar.
Part 1. Getting ETH
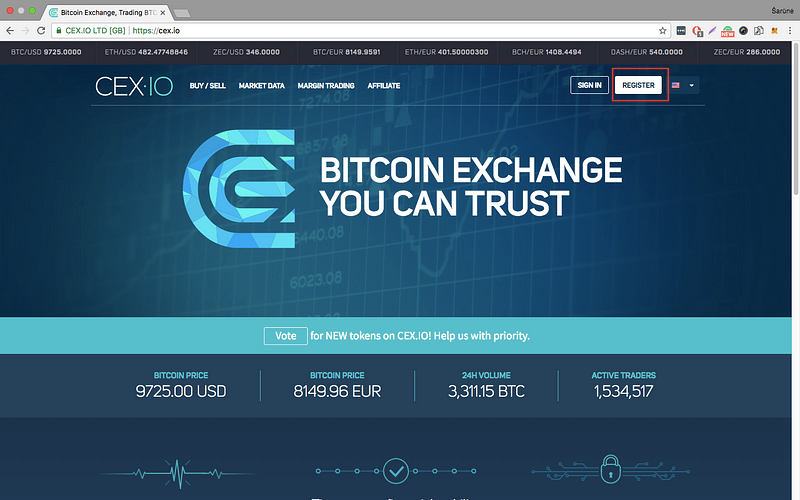
Step 1: Go to Cex.io and press REGISTER
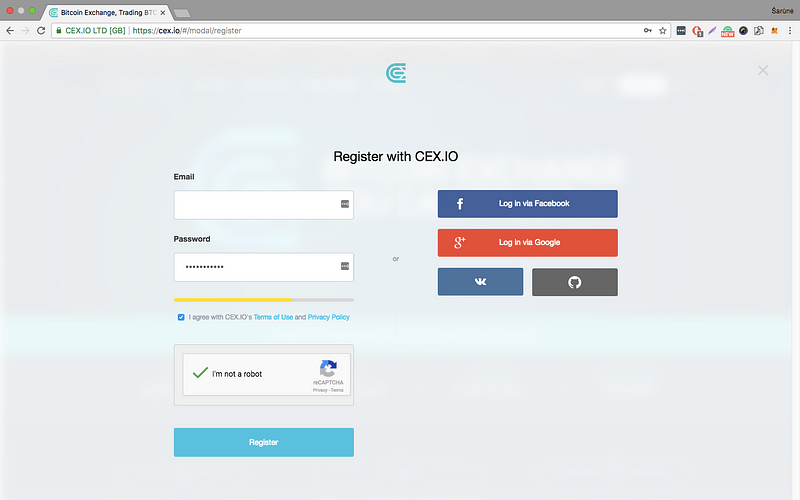
Step 2: Sign up with your email and choose a secure password. You can use an alternative way from the column on the right:
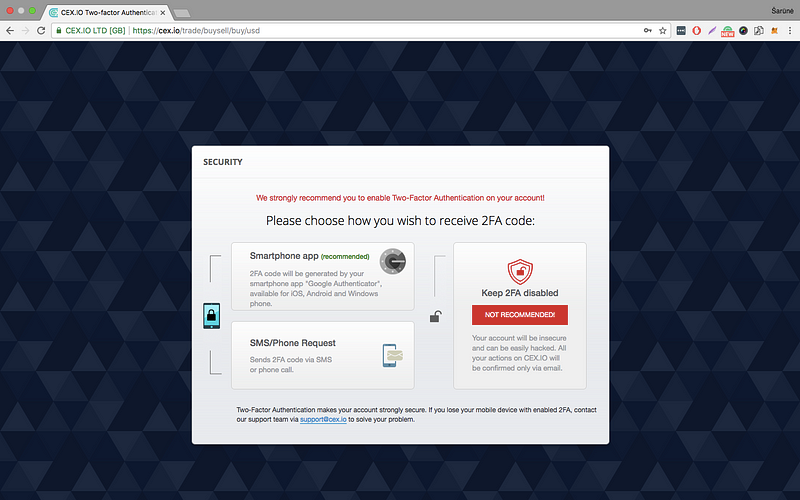
Step 3 : Select 2-step verification method to increase security.
Step 4: Confirm your email.
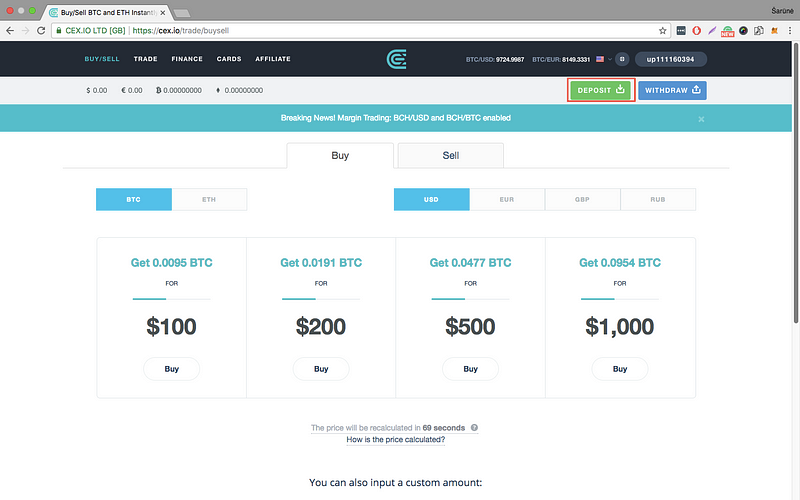
Step 5: Once you confirm your email you should see a screen similar to this one. Select DEPOSIT.
Step 6. Select Payment card and press Add a new card
Step 7: Enter your card details, take two selfies as described in the instructions. Enter the CVV of your card and get it verified.
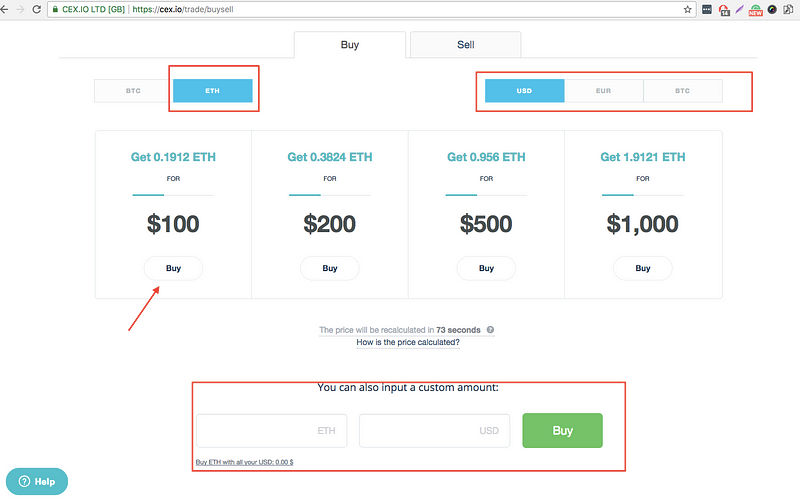
Step 8: Once you verify your card go to BUY/SELL. Select ETH and the currency of your card. Choose an amount from the list or enter a custom one and press BUY.
NOTE: The
fee on Deposit and Withdrawal varies for various Debit/Credit card as
well as the fiat currency. Make sure that you go through the fee structure prior to making the final payment.
PART 2. Transfer ETH to your wallet
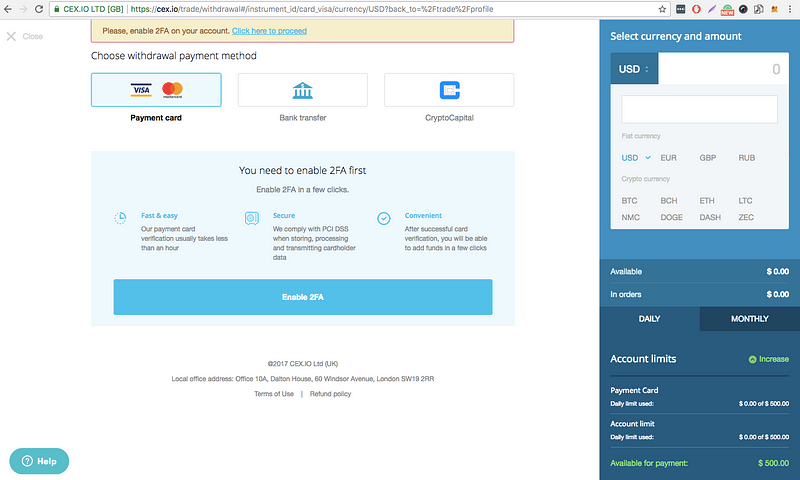
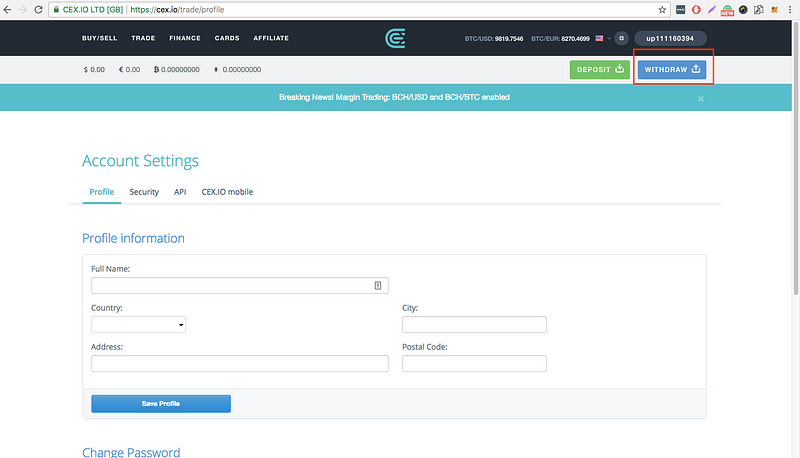
Step 1: Log in to your account and select WITHDRAW
Step 2: Select ETH from the drop down menu and enter the desired amount.
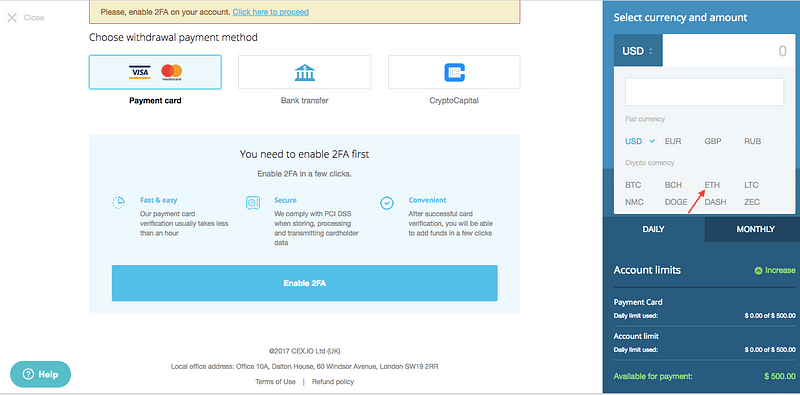
Step 3: Add your Ethereum wallet address and transfer ETH to your wallet.
Access your Ether wallet and see the balance. Note that transactions may take some time.
Join Obirum ICO at:
Website: ico-obirum
Obirum
Blockchain Browser